Reflections
How To Fold a Palm Cross- 12 Easy Steps
It is a popular tradition in many Christian communities to fold a palm cross out of the palms used during the Palm Sunday services. Every year I collect a small stack of palms to take home with me and spend the afternoon making palm crosses using these 12 easy steps! There are a couple different approaches for folding palm crosses but I have found from experience this is the easiest way to make a Palm Sunday cross. Simply follow these 12 easy steps and you will always remember how easy it is to fold a palm cross! Here is how to make a palm cross in under 3 minutes:
1. Fold Backwards
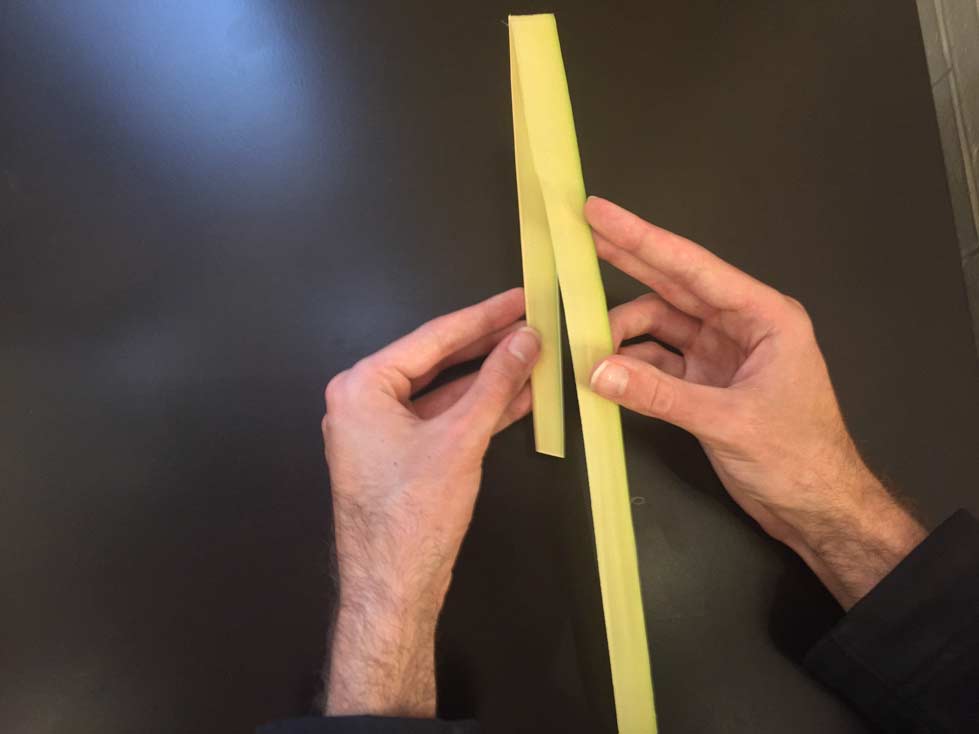
Gently bend the top of the palm backwards away from you, do not crease. The length of the piece in the back will determine the final length of the cross.
2. Fold to the Right
Identify the point where you want the cross bar to be. Fold the front section to the right making an angled crease.
3. Fold to the Left
Take the long section pointing to the right and fold it BEHIND the cross so that the long section is now pointing to the left.
4. Fold to the Right AGAIN
Take the long section pointing to the left and fold it in FRONT of the cross so that the long section is now pointing to the right.
5. FLIP the Cross. Do Not Bend
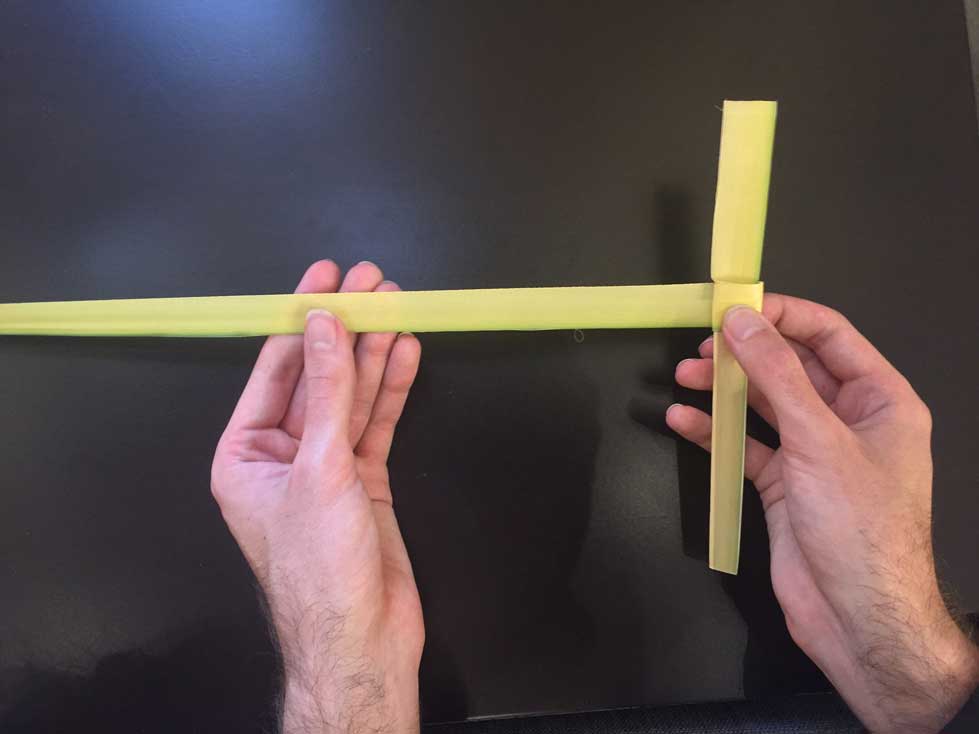
FLIP the cross around so that the long section pointing to the right is now pointing to the left. Do not perform any bend simply turn the cross so that the angled crease made in step 2 is in the back of the cross.
6. Fold to the Right AGAIN
Take the long section pointing to the left and fold it in FRONT of the cross so that the long section is now pointing to the right. You are already half way through making a Palm Sunday cross!
7. Gently Fold the First Arm
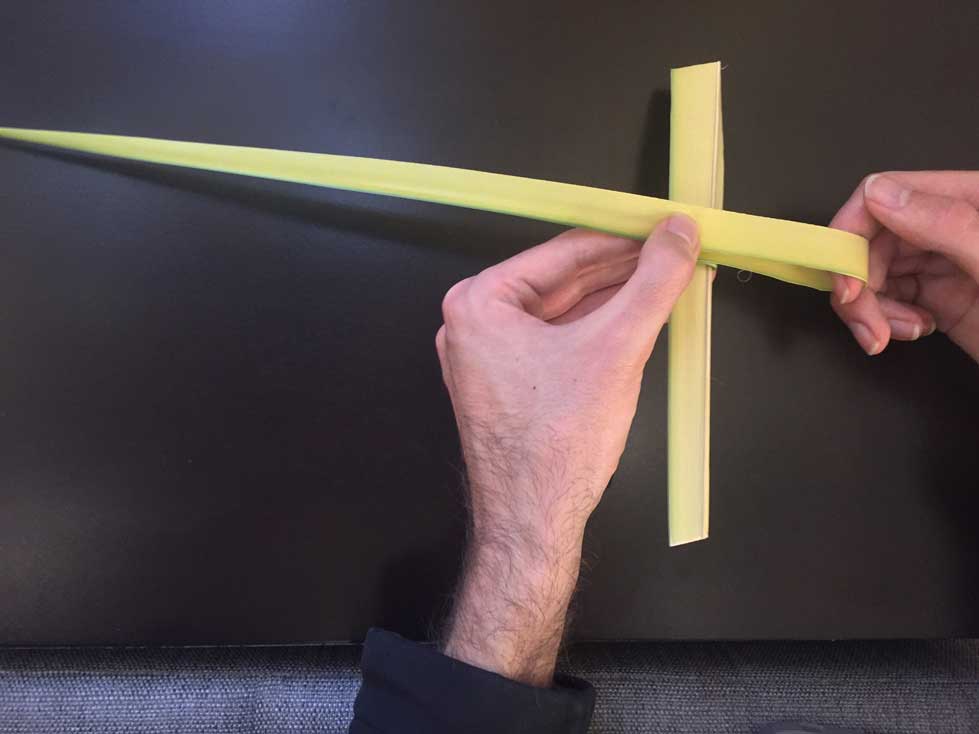
Identify how long you want the arms of the cross to be. Take the long section that is pointing to the right and gently fold (do not crease) across the front of the cross, so that it now points left.
8. Gently Fold to the Second Arm
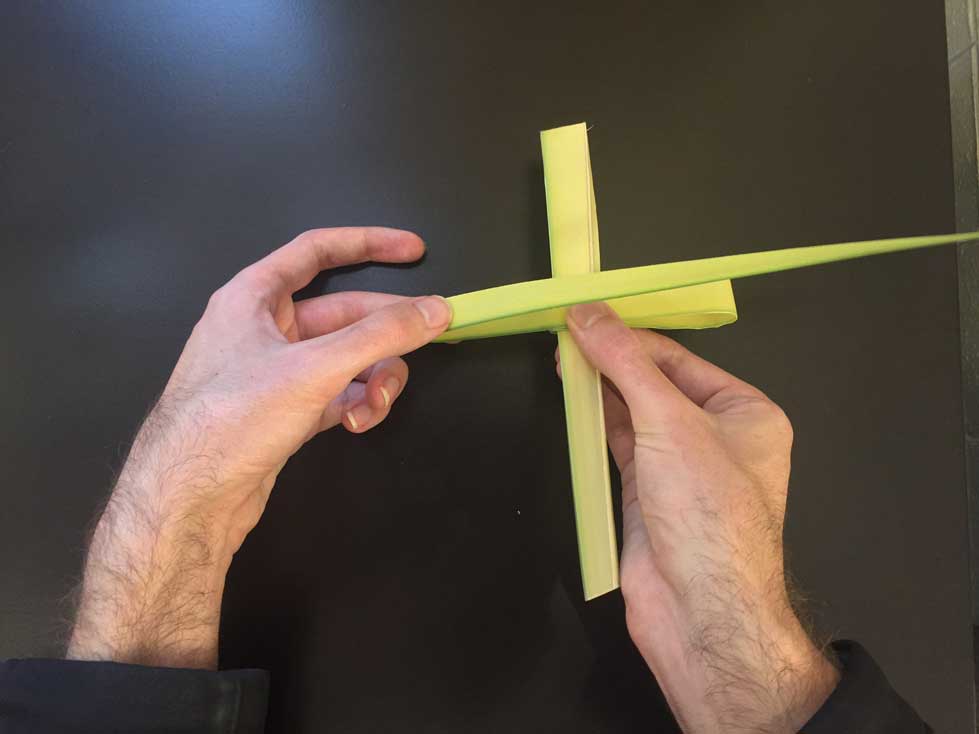
Take the long section that is pointing to the left and again gently fold (do not crease) across the front of the cross, so that it now points right.
9. Fold Upwards
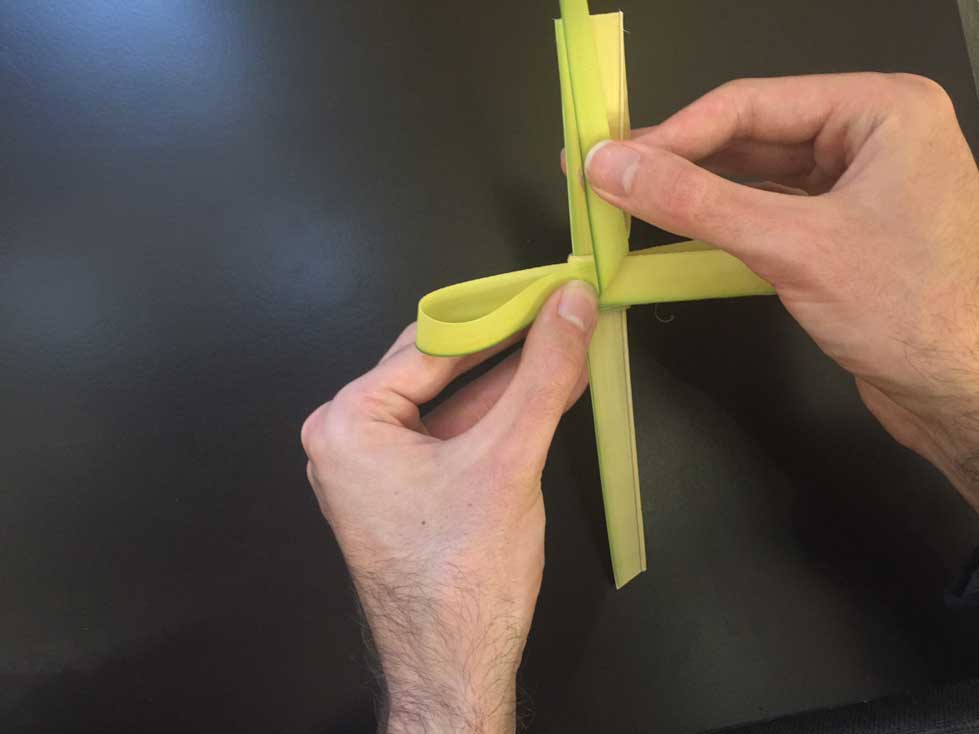
At the center of the cross, make an angled crease so that the long end points UP.
10. Thread Through the Center

Take the tip of the long end (that is facing up) and thread it behind the layers of the crossbar that were made when wrapping around in steps 2-6.
Pull the end tight, making sure you keep your thumb pressed on the center so that the crossbars do not come loose.
11. Thread Through the Center AGAIN
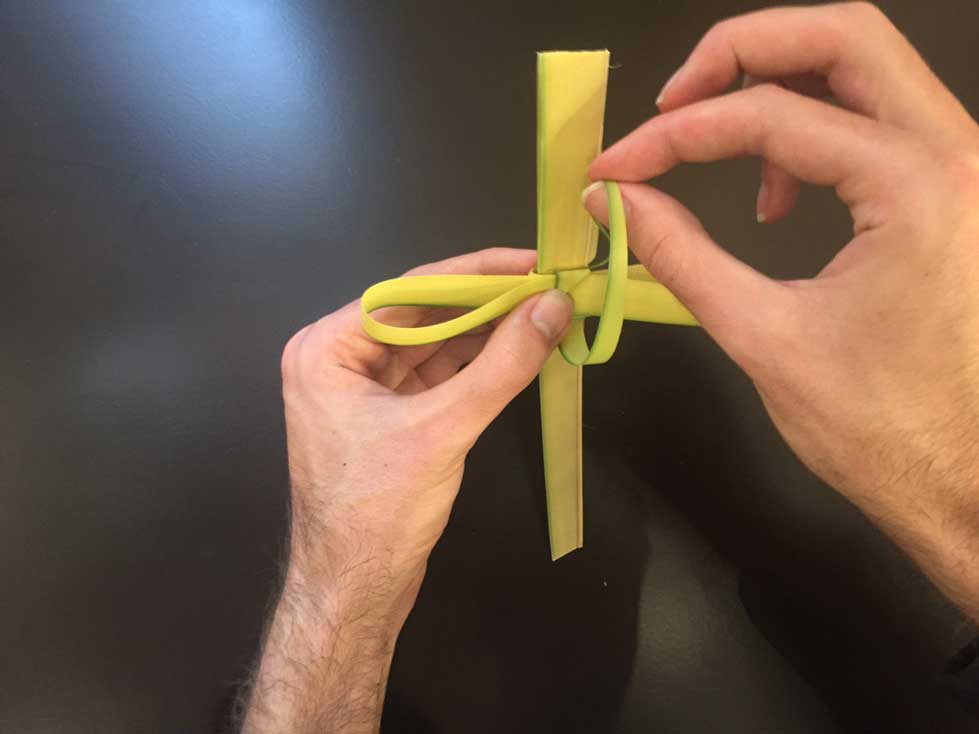
Take the tip of the long end (that is now facing down) and thread it behind the layers of the crossbar AGAIN and pull the end tight.
Optional: cut off the excess strand
12. Display the Cross in a Place of Honor
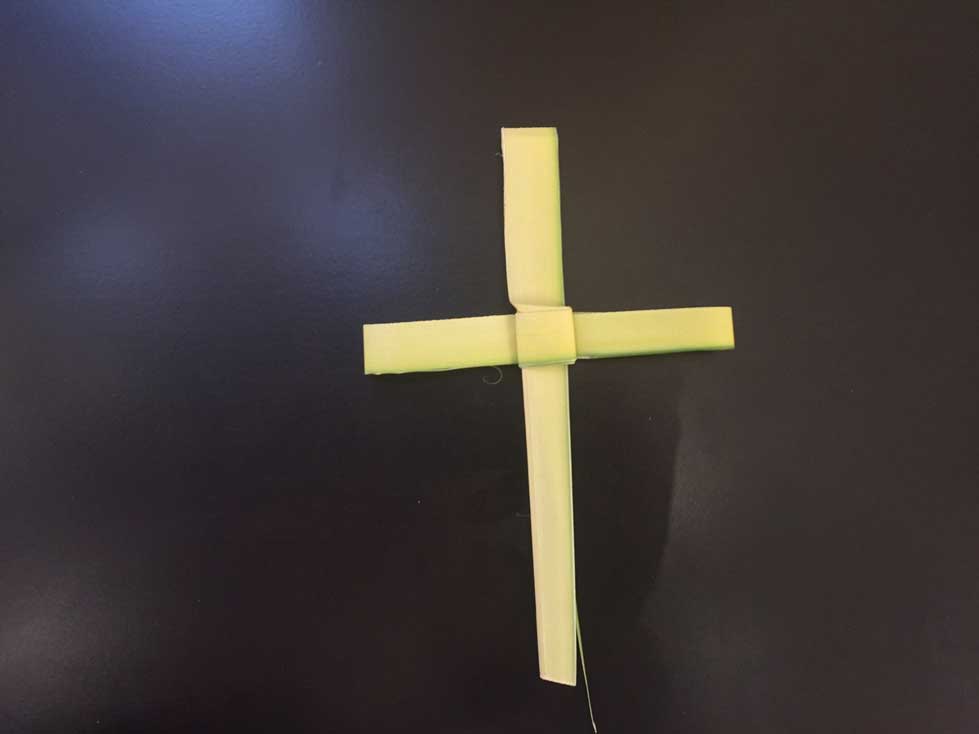
The palm cross may be used to prayerfully decorate your home by tucking it behind a religious painting, crucifix, or kept in the glove box of your car along with a car rosary or auto statue.
It is important to remember, that because the palms are blessed, they cannot simply be thrown out as trash or discarded. If you do not want to keep the cross or you have excess palms, they should be returned to your church to be burned. The ashes will used to mark the faithfuls’ foreheads on the next Ash Wednesday.
5 Things You Should Know About Palm Sunday

